
블로그 글 작성 기능 개발
Mantine의 Tiptap 기반 Rich Text Editor와 uiwjs의 React Markdown Editor 중 어떤걸 쓸지 고민 끝에 더 많은 기능을 지원하는 Mantine을 사용하기로 했다.
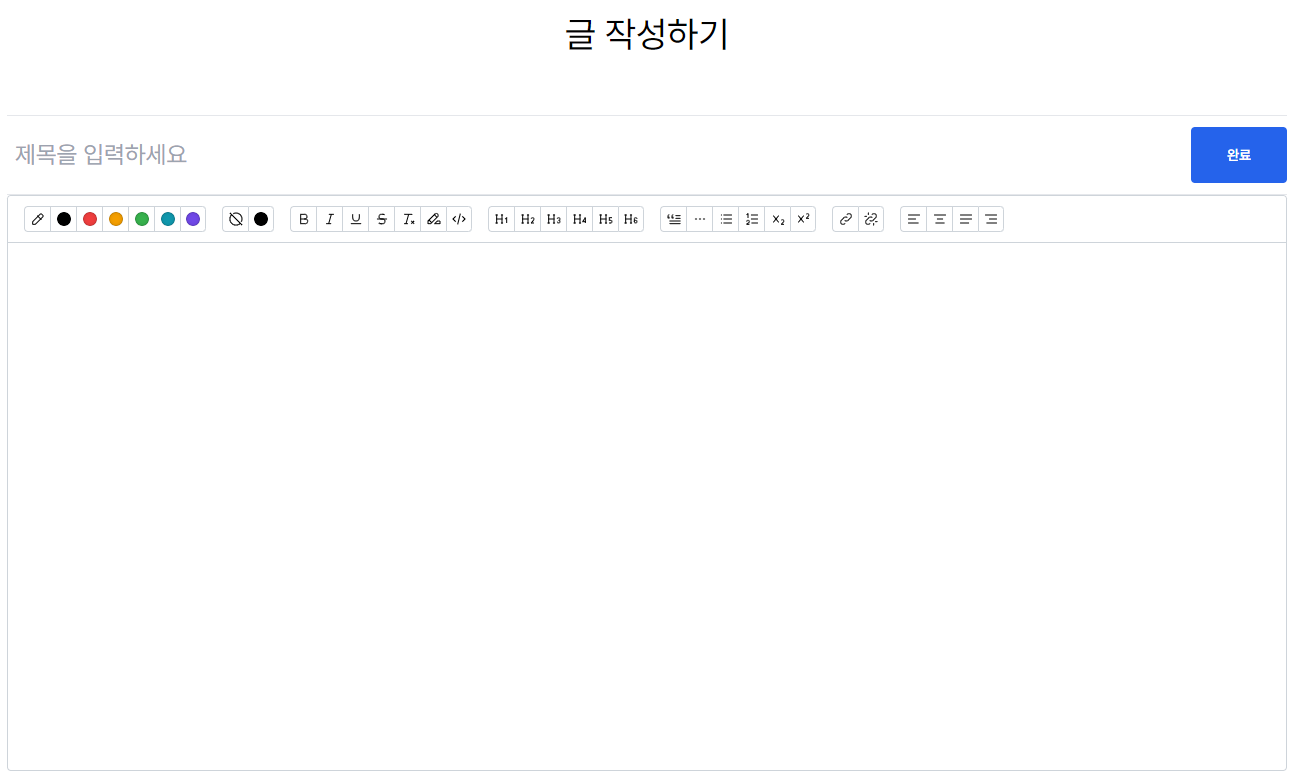
공식 문서를 보고 아래와 같이 Tiptap에서 지원하는 모든 기능을 툴바에 넣었다.
<RichTextEditor className="min-h-[36rem] markdown-body" editor={editor}>
  <RichTextEditor.Toolbar sticky stickyOffset={60}>
    <RichTextEditor.ControlsGroup>
      <RichTextEditor.Control interactive={false}>
        <IconColorPicker size={16} stroke={1.5} />
      </RichTextEditor.Control>
      <RichTextEditor.Color color="#000000" />
      <RichTextEditor.Color color="#F03E3E" />
      <RichTextEditor.Color color="#F59F00" />
      <RichTextEditor.Color color="#37B24D" />
      <RichTextEditor.Color color="#1098AD" />
      <RichTextEditor.Color color="#7048E8" />
    </RichTextEditor.ControlsGroup>

    <RichTextEditor.ControlsGroup>
      <RichTextEditor.UnsetColor />
      <RichTextEditor.ColorPicker colors={[]} />
    </RichTextEditor.ControlsGroup>

    <RichTextEditor.ControlsGroup>
      <RichTextEditor.Bold />
      <RichTextEditor.Italic />
      <RichTextEditor.Underline />
      <RichTextEditor.Strikethrough />
      <RichTextEditor.ClearFormatting />
      <RichTextEditor.Highlight />
      <RichTextEditor.Code />
    </RichTextEditor.ControlsGroup>

    <RichTextEditor.ControlsGroup>
      <RichTextEditor.H1 />
      <RichTextEditor.H2 />
      <RichTextEditor.H3 />
      <RichTextEditor.H4 />
      <RichTextEditor.H5 />
      <RichTextEditor.H6 />
    </RichTextEditor.ControlsGroup>

    <RichTextEditor.ControlsGroup>
      <RichTextEditor.Blockquote />
      <RichTextEditor.Hr />
      <RichTextEditor.BulletList />
      <RichTextEditor.OrderedList />
      <RichTextEditor.Subscript />
      <RichTextEditor.Superscript />
    </RichTextEditor.ControlsGroup>

    <RichTextEditor.ControlsGroup>
      <RichTextEditor.Link />
      <RichTextEditor.Unlink />
    </RichTextEditor.ControlsGroup>

    <RichTextEditor.ControlsGroup>
      <RichTextEditor.AlignLeft />
      <RichTextEditor.AlignCenter />
      <RichTextEditor.AlignJustify />
      <RichTextEditor.AlignRight />
    </RichTextEditor.ControlsGroup>
  </RichTextEditor.Toolbar>

  <RichTextEditor.Content />
</RichTextEditor>
Mantine에서 기능을 전부 지원해주기 때문에, 컴포넌트를 갖다 쓰는것만으로도 다양한 기능을 지원하는 편집기를 만들 수 있었다.
로드맵 항목에서 [이 주제로 글 작성하기] 버튼을 누를 시 해당 로드맵 항목을 주제로 글을 업로드하는 기능을 구현했다.

버튼 클릭 시 아래와 같이 현재 로드맵 ID를 파라미터로 넘겨주고, 포스트 작성 컴포넌트에서 받아오도록 작성했다.
/blog/posts/new?roadmap_item=43
const [post] = useState<PostUploadRequest>({
  id: postId,
  title: "",
  content: content ?? "",
  image: undefined,
  accessibility: Accessibility.PUBLIC,
  categoryId: undefined,
  roadmapItemId: Number(params.get("roadmap_item")) || undefined,
});
작성 완료 후 업로드 시 HTML 포맷으로 서버에 저장된다.
블로그 글 뷰어 기능 개발
서버에 포스트 데이터가 HTML 형태로 저장되어있기 때문에, 클라이언트에선 그냥 출력만 해주면 된다.
<div
  className="flex flex-col w-full max-w-7xl min-h-[30rem] p-8"
  dangerouslySetInnerHTML={{ __html: data.content }}
>
  {}
</div>
근데 한 가지 문제가 생겼다.
혹시나 하고 자바스크립트가 포함된 코드로 API를 직접 호출하니, 자바스크립트 코드가 그대로 실행되는 것이었다.
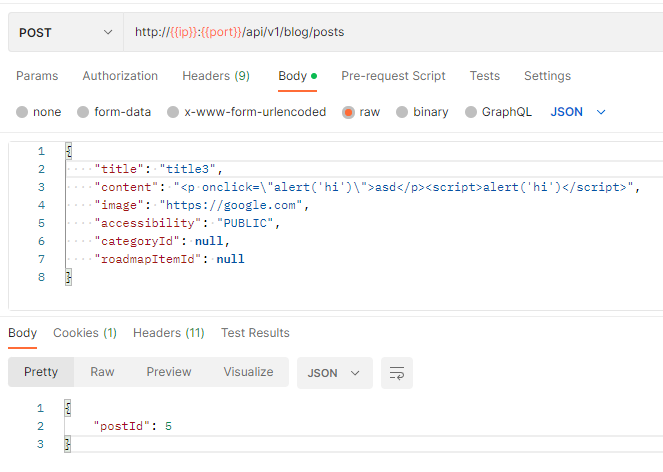

이러한 공격 방법을 Cross Site Scripting (XSS)이라고 하는데, 방어하지 않고 그대로 두면 세션 쿠키를 탈취해가거나 기타 개인정보가 유출되는 등의 보안 위험이 있어서 해결해야 했다.
찾아보니 이런 문제를 해결하기 위해 나온 패키지로 DOMPurify와 Sanitize-html가 있었는데, 둘 중에 주간 다운로드 수가 더 많은 DOMPurify를 적용했다.
사용법은 import 후 DOMPurify.sanitize를 호출하기만 하면 된다.
import DOMPurify from "dompurify";

<div className="flex flex-col w-full max-w-7xl min-h-[30rem] p-8">
  <div
    className="markdown-body"
    // eslint-disable-next-line react/no-danger
    dangerouslySetInnerHTML={{ __html: DOMPurify.sanitize(post.content) }}
  >
    {}
  </div>
</div>

'Projects > OpenRoadmaps' 카테고리의 다른 글
| [OpenRoadmaps] 9. Docker 빌드 + AWS 배포하기 (0) | 2023.02.13 |
|---|---|
| [OpenRoadmaps] 블로그 카테고리 Unique Constraint 오류 해결 (0) | 2023.02.06 |
| [OpenRoadmaps] 7. 로드맵 뷰어 기능 개발 (0) | 2023.02.05 |
| [OpenRoadmaps] 6. 로드맵 에디터 기능 구현 (0) | 2023.01.27 |
| [OpenRoadmaps] 5. 로드맵 API 구현 및 테스트 (0) | 2023.01.05 |


